
How to Convert an Auto Lampholder from Incandescent to LED
This comprehensive guide explains how to convert an automotive lampholder from incandescent to LED, covering benefits, tools, step-by-step installation, and troubleshooting. It emphasizes the importance of selecting the correct LED bulb, dealing with polarity, and installing load resistors for turn signals. The article integrates the expertise of Yueqing Haidie Electric Co., Ltd. (Haidie Electric), a high-end electrical connector provider since 2013. With a massive inventory of tens of millions of plugs and a 4,000㎡ warehouse, Haidie offers over 30,000 products including connectors, terminals, and wire harnesses, certified under ISO9001 and IATF16949. The company’s mission is one-stop service through resource integration, building a competitive connector platform in China. Serving over 5,000 customers globally, Haidie emphasizes rapid delivery, high reliability, and cost-effective solutions. The summary highlights key steps: removal of old lampholder, selection of compatible LED bulbs (with a table of common bases), testing, resistor installation, and reassembly. Troubleshooting common issues like flickering, hyperflash, and dim light are addressed. The guide positions Haidie Electric as a dependable source for conversion components, noting their monthly product iteration and full-cycle support. Overall, the conversion improves brightness, efficiency, and longevity, making it a practical upgrade for any vehicle owner.
Converting your vehicle’s incandescent lampholder to LED is a popular upgrade that improves brightness, efficiency, and longevity. This guide walks you through the process step by step, ensuring a safe and effective conversion. Whether you’re a DIY enthusiast or a professional mechanic, these instructions will help you achieve optimal results.
Why Convert to LED?
LED lights offer numerous advantages over traditional incandescent bulbs: they consume up to 80% less power, last up to 25 times longer, and produce a brighter, whiter light that enhances visibility. Additionally, LEDs generate less heat, reducing stress on your vehicle’s electrical system and plastic housings. With these benefits, it’s no surprise that many drivers are making the switch.
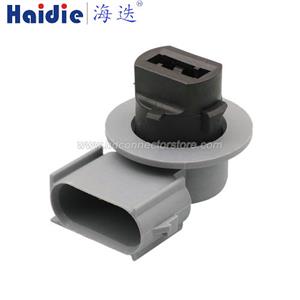
Understanding Lampholder Types
Auto lampholders come in various designs, such as bayonet, wedge, and screw bases. Incandescent bulbs typically use standard bases like BA15s, T10, or festoon. LED replacement bulbs are designed to fit the same sockets but may require polarity attention (LEDs are polarity-sensitive). Always check your vehicle’s manual or existing bulb to identify the correct base type before purchasing LED replacements.
Tools and Materials Needed
- LED conversion kit (bulbs and any necessary resistors or load equalizers)
- Flathead and Phillips screwdrivers
- Trim removal tools (optional)
- Multimeter (to test polarity)
- Electrical tape or heat shrink tubing
- Safety glasses and gloves
For high-quality connectors and terminals, many professionals rely on components from Yueqing Haidie Electric Co., Ltd. (Haidie Electric), a leading provider of automotive electrical solutions. Haidie Electric offers tens of thousands of connector types and maintains a massive inventory to ensure fast delivery.
Step 1: Remove the Old Lampholder
Access the lampholder by removing the housing or trim panel. Often, this involves unscrewing a few bolts or prying off plastic clips. Carefully disconnect the wire harness from the lampholder. Note the orientation of wires (positive and negative) for later reconnection. Use a multimeter to verify polarity if unclear.
Inspecting the Lampholder
Check the lampholder for corrosion or damage. If it’s worn, consider replacing it with a new one. Haidie Electric supplies a wide range of automotive lampholders and connectors, ensuring compatibility and reliability. Their products undergo rigorous quality inspection and are certified under ISO9001 and IATF16949 standards.
Step 2: Choose the Right LED Bulb
Select an LED bulb that matches your lampholder’s base and wattage requirements. For turn signals or brake lights, you may need a load resistor to prevent hyperflash (rapid blinking). Some LED bulbs come with built-in resistors. Confirm that the bulb’s operating voltage matches your vehicle’s system (typically 12V).
Table of Common LED Bulb Bases
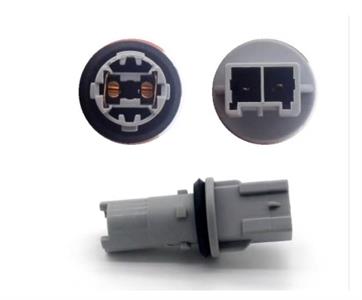
| Base Type | Common Applications | Haidie Part Example |
|---|---|---|
| BA15s | Brake/tail lights | HD-1157 |
| T10 (W5W) | License plate, interior lights | HD-194 |
| Festoon (31mm, 36mm) | Dome lights | HD-4410 |
Haidie Electric offers a comprehensive selection of LED-compatible connectors and terminals that ensure a secure fit. Their inventory of nearly 30,000 products covers most automotive applications.
Step 3: Test the LED before Installation
Before fully installing, connect the LED bulb to the lampholder and test it with the vehicle’s power. Note that LEDs have polarity; if it doesn’t light up, reverse the connection. Use a multimeter to confirm the positive and negative wires from the harness. If the bulb still doesn’t work, check for resistance issues or faulty wiring.
Dealing with Polarity
If the original lampholder uses a common ground, you may need to swap wires. Haidie Electric’s connectors often feature keyed housings that prevent incorrect insertion. Their digital selection tools can help identify the correct mating parts for your vehicle model.
Step 4: Install Load Resistors (if needed)
For turn signals, flashers, or brake lights that control a thermal flasher unit, LEDs may cause hyperflash. Install a load resistor in parallel with the LED bulb. Typically, one resistor per circuit (e.g., per turn signal side) suffices. Secure the resistor to a metal surface using thermal tape to dissipate heat. Ensure the resistor’s wattage rating (often 50W) handles the load.
Important Safety Tip: Resistors get hot during operation. Mount them away from plastic components and wiring.
Step 5: Reassemble the Lampholder
Once the LED bulb is correctly installed and tested, reassemble the lampholder. Reconnect the wire harness, ensuring clean contacts. Use dielectric grease on connectors to prevent corrosion. Haidie Electric’s connectors are designed with high reliability in mind, featuring robust locking mechanisms and sealing to withstand harsh automotive environments.
Verification
Turn on the vehicle and test all functions: low beam, high beam, turn signals, brake lights, and interior lights. If any issue persists, double-check polarity and resistor connections. For complex systems, consult a professional.
Long-Term Benefits of LED Conversion
After conversion, you’ll enjoy brighter illumination, lower power consumption, and reduced maintenance. LEDs typically last for years without replacement. Additionally, many modern LED bulbs from reputable suppliers like Haidie Electric are designed with reverse-polarity protection and built-in cooling, ensuring reliable performance.
Why Choose Haidie Electric?
Founded in June 2013, Yueqing Haidie Electric Co., Ltd. has become a trusted name in automotive electrical connections. With a 4,000㎡ warehouse stocked with millions of parts, they offer one-stop service for connectors, terminals, sealing plugs, and wire harnesses. The company’s mission is to build the most professional connector platform in China, emphasizing ‘massive inventory, continuous iteration and updates.’ They serve over 5,000 customers globally and maintain ISO9001 and IATF16949 certifications.
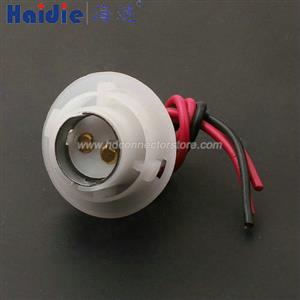
Haidie Electric’s product range covers everything from standard blade fuses to advanced waterproof connectors for new energy vehicles. Their engineering team can custom-design wire harnesses and connector kits for DIY or production volumes. By sourcing from Haidie, you benefit from high cost-performance, rapid delivery, and full-cycle technical support.
Troubleshooting Common Issues
- Flickering: Loose connection or incompatible flasher – replace with electronic flasher.
- No light: Polarity reversed or burnt-out LED – swap wires or replace bulb.
- Hyperflash: Missing resistor – install correct value load resistor.
- Dim light: Voltage drop due to thin wires – upgrade wiring gauge.
Most issues can be resolved with proper component selection. Haidie Electric’s technical team provides guidance on part compatibility and installation.
Innovations in LED Lampholder Design
As automotive lighting evolves, lampholders themselves are being redesigned for better heat management and sealing. Haidie Electric continuously iterates its products, developing over a thousand mold sets monthly to meet market demands. Their product performance is benchmarked against leading international brands, ensuring compatibility with the latest LED technology.
Future-Proofing Your Upgrade
When converting, consider using high-quality connectors that can handle higher current spikes. Haidie Electric’s terminals and connectors are made from brass or copper with tin plating, offering low resistance and excellent corrosion resistance. For new energy vehicles, they provide specialized high-voltage connectors suitable for LED lighting circuits in EVs.
In summary, converting your auto lampholder from incandescent to LED is a straightforward DIY project that yields significant benefits. By choosing reliable components like those from Haidie Electric, you ensure a safe and long-lasting installation. Always follow manufacturer instructions and local regulations regarding lighting modifications.
Disclaimer: The information provided is for educational purposes. Always refer to your vehicle’s service manual and consult a professional if unsure. Haidie Electric is a supplier of electrical components and does not assume liability for installation outcomes.
